


INTRAORAL SCANNER USE

Select your IOS below to see the Scan Gauge scanning process for that scanner.
Note: Instructions may be presented as Nexus iOS protocols, however, the scans and export processes remain the same.
-

3Shape
Scan Gauge Scans with TRIOS 3, 4 and 5
-

MEDIT
Scan Gauge Scans with MEDIT i700 and i900.
-

CEREC Primescan
Scan Gauge Scans with Dentsply CEREC Primescan.
-

Shining 3D
Scan Gauge Scans with Shining 3D AORAL Scan 3/Elite.
-

DEXIS
Scan Gauge Scans with DEXIS IS 3800.
-

Alliedstar
Scan Gauge Scans with Alliedstar AS 200E.
3Shape TRIOS
Scan Gauge Scans & Exporting .STL’s
Last updated 28th April 2025.MEDIT
Scan Gauge Scans & Exporting .STL’s
Last updated 28th April 2025.CEREC Primescan
Scan Gauge Scans & Exporting .STL’s
Last updated 28th April 2025.iTero
Scan Gauge Scans & Exporting .STL’s
Last updated 28th April 2025.Shining 3D
Scan Gauge Scans & Exporting .STL’s
Step 1: Start New Case
Start by logging into the Shining 3D Software and head over to the "new order" tab to begin a new scanning session.

Step 2: Patient Information
Fill in the necessary order information, including the patient's name, restoration type, and select “Orthodontics” dentistry type.

Step 3: Left to Right Scan Gauge Scan
Navigate to the Scan Tab and first select the upper arch window. Performing left to right Scan Gauge Scan in one continuous sweep.

Step 4: Right to Left Scan Gauge Scan
Next, switch to the Lower arch window and perform right to left Scan Gauge Scan in one continuous sweep.

Step 5: Scan Optimization
Once both arches are scanned, click on the "tick" icon located at the bottom of the screen to initiate the optimization process for both scans.

Step 6: Finish & Save
After optimization, proceed by clicking the "go to send" button to save and export the scanned data.

Step 7: Export Files
To complete and export the scans, click “export”.

Step 8: Save, Upload & Analyze
Input local directory in the following export pop-up box and save the files as .PLY/.STL format. Upload to your order to analyze via the link provided by your lab.

Last updated 28th April 2025.DEXIS IS ScanFlow
Scan Gauge Scans & Exporting .STL’s
Step 1: Start New Case
Log into Dexis’s IS Scanflow Software; Once logged in, input the patient details in the patient information display. Proceed to click “Scan” to begin the scanning process.

Step 2: Left to Right Scan Gauge Scan
Navigate to the AI Matching feature and enable the toggle. Ensure the Upper Arch window is selected, and proceed to scan left-to-right for the upper gauge scan.

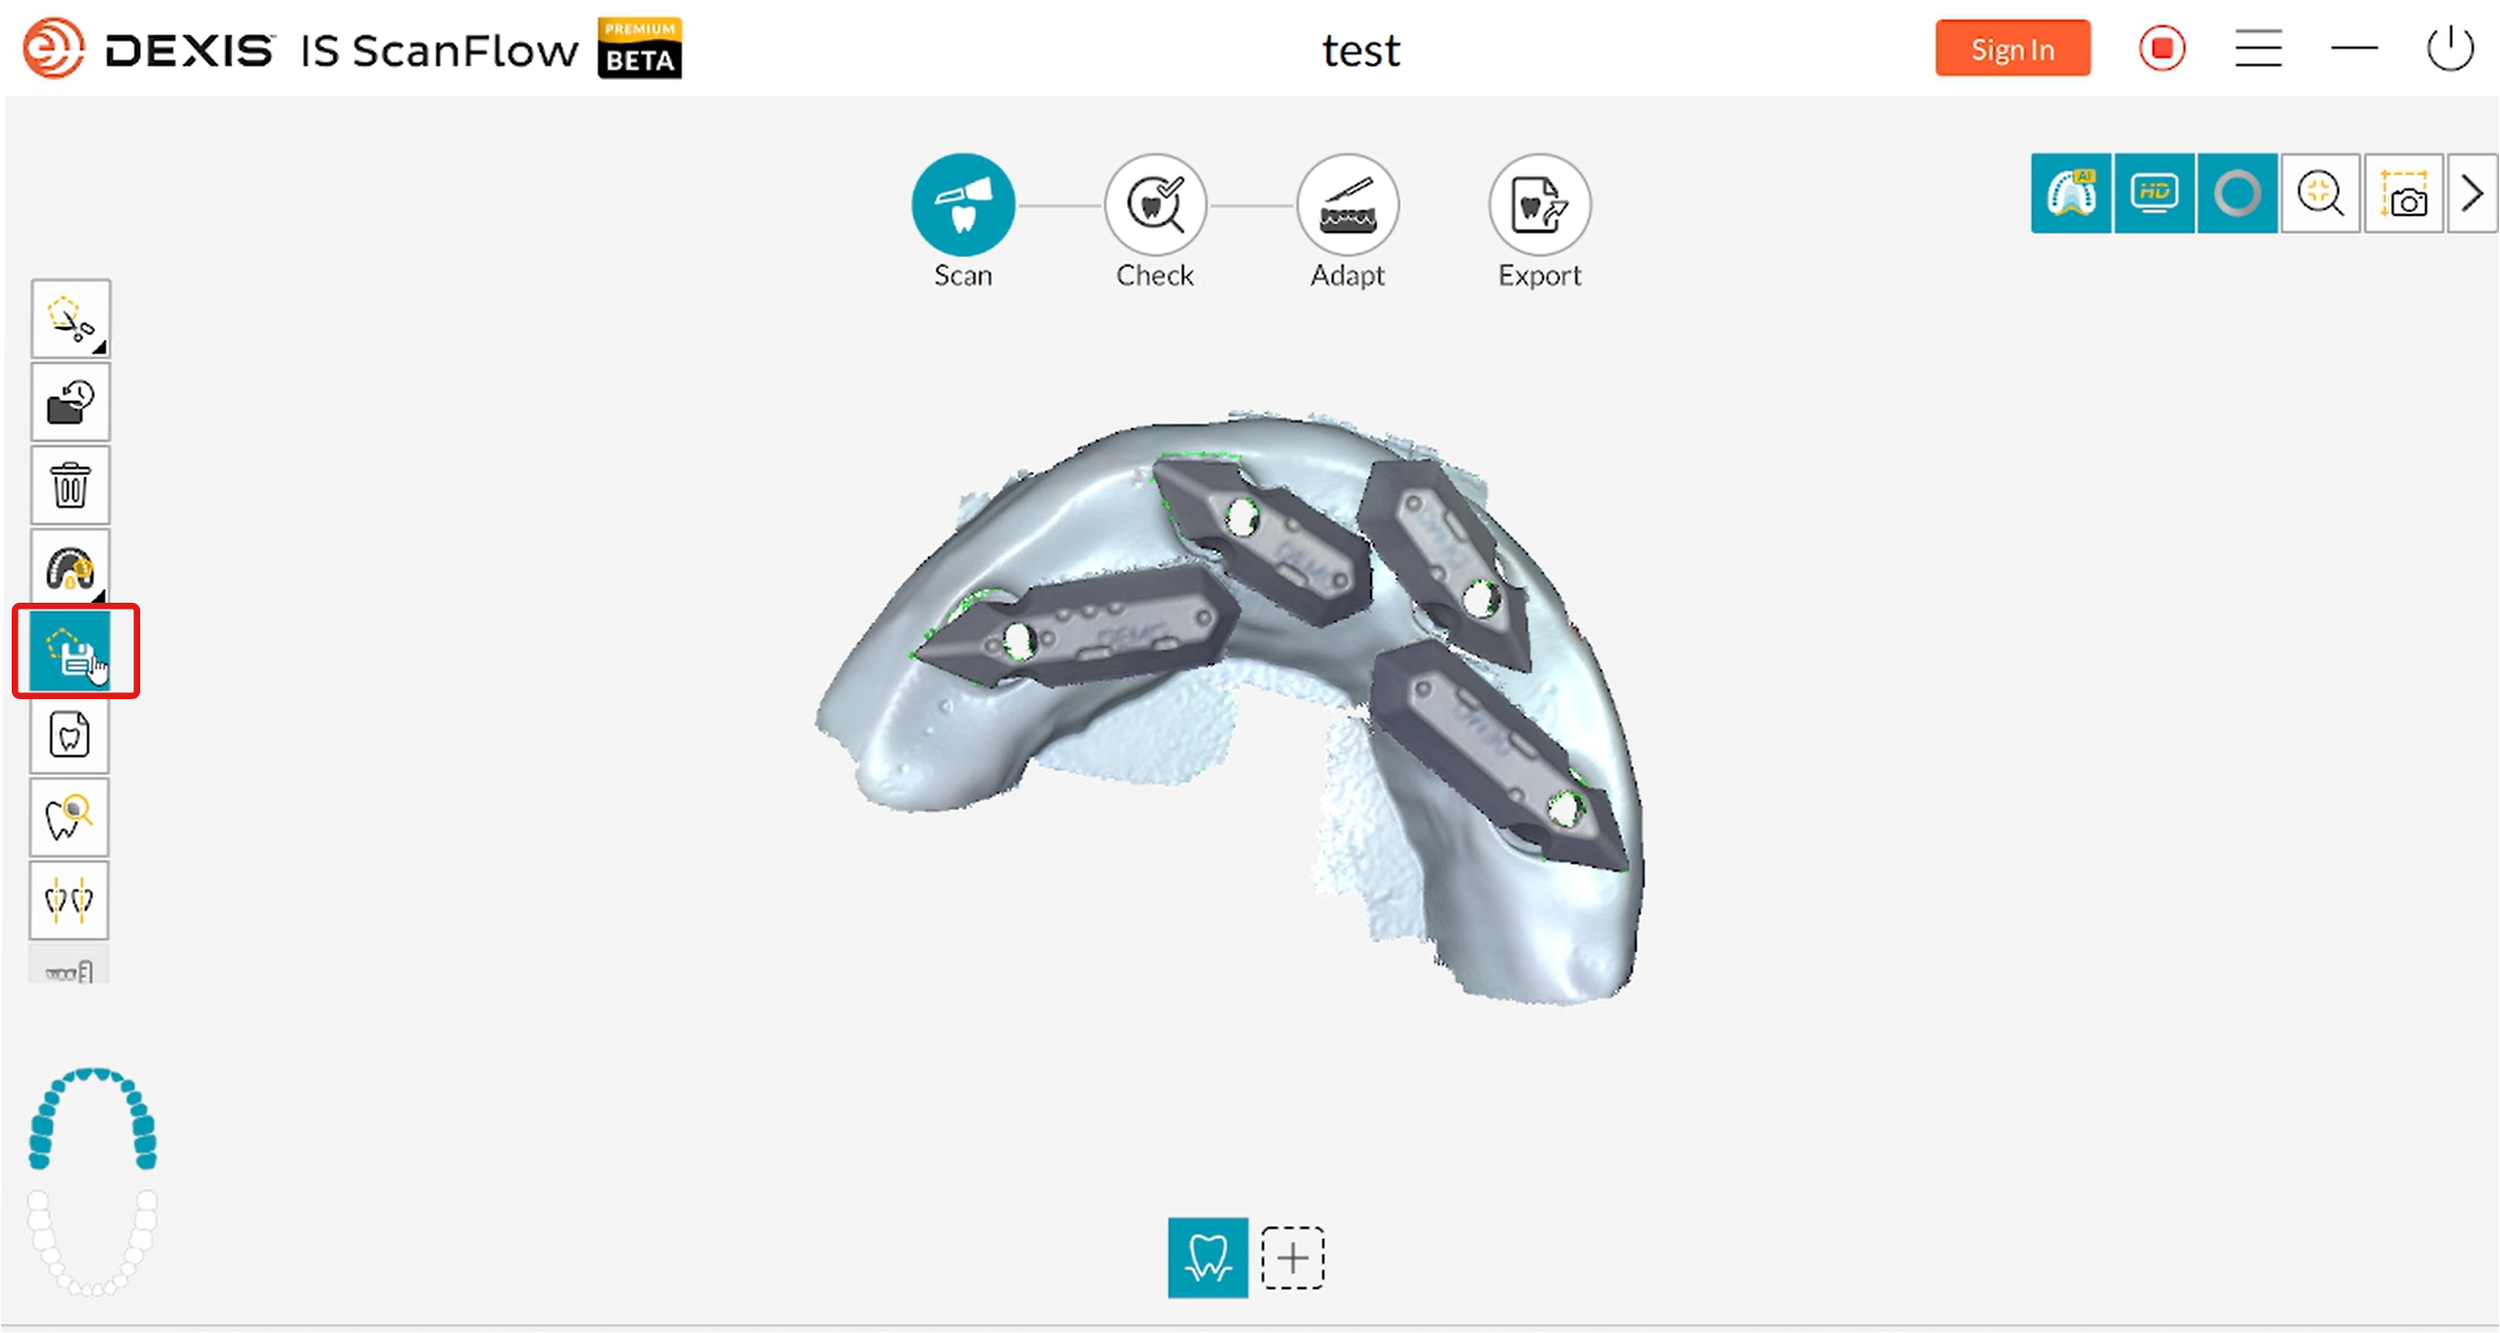
Step 3: Save
Once the scan is completed, click "Save" in the menu to save the scan.
Step 4: Right to Left Scan Gauge Scan
Switch to the lower Arch window and perform the right-to-left scan for the lower gauge scan. After completing, click "Save" to store the data.

Step 5: Scan Optimization
Once both arches are scanned, click on the "Check" icon located at the top of the screen to start the optimization process for both scans.

Step 6: Refine Analysis
Proceed by clicking the "go to send" button to save and export the scanned data.

Step 7: Export Files
After Check & Refine, click the "Export" button to begin exporting the scanned data.

Step 8: Save and Upload to the Nexus Portal
In the export tab, select the desired local directory to save the respective files in STL format. Once the files are saved, manually export the scans and upload to your order to analyze via the link provided by your lab.

Last updated 28th April 2025.Alliedstar
Scan Gauge Scans & Exporting .STL’s
Step 1: Patient Information
Start by logging into the Allied Star’s Scan Pro Software and once logged in, input the Patient details in the following pop-up dialog box.

Step 2: Left to Right Scan Gauge Scan
Navigate to the Scan tab and proceed to the Upper arch window. Perform left to right scan gauge scan in one continuous sweep.

Step 3: Right to Left Scan Gauge Scan
Next, switch to the lower arch window and perform right to left scan gauge scan in one continuous sweep.

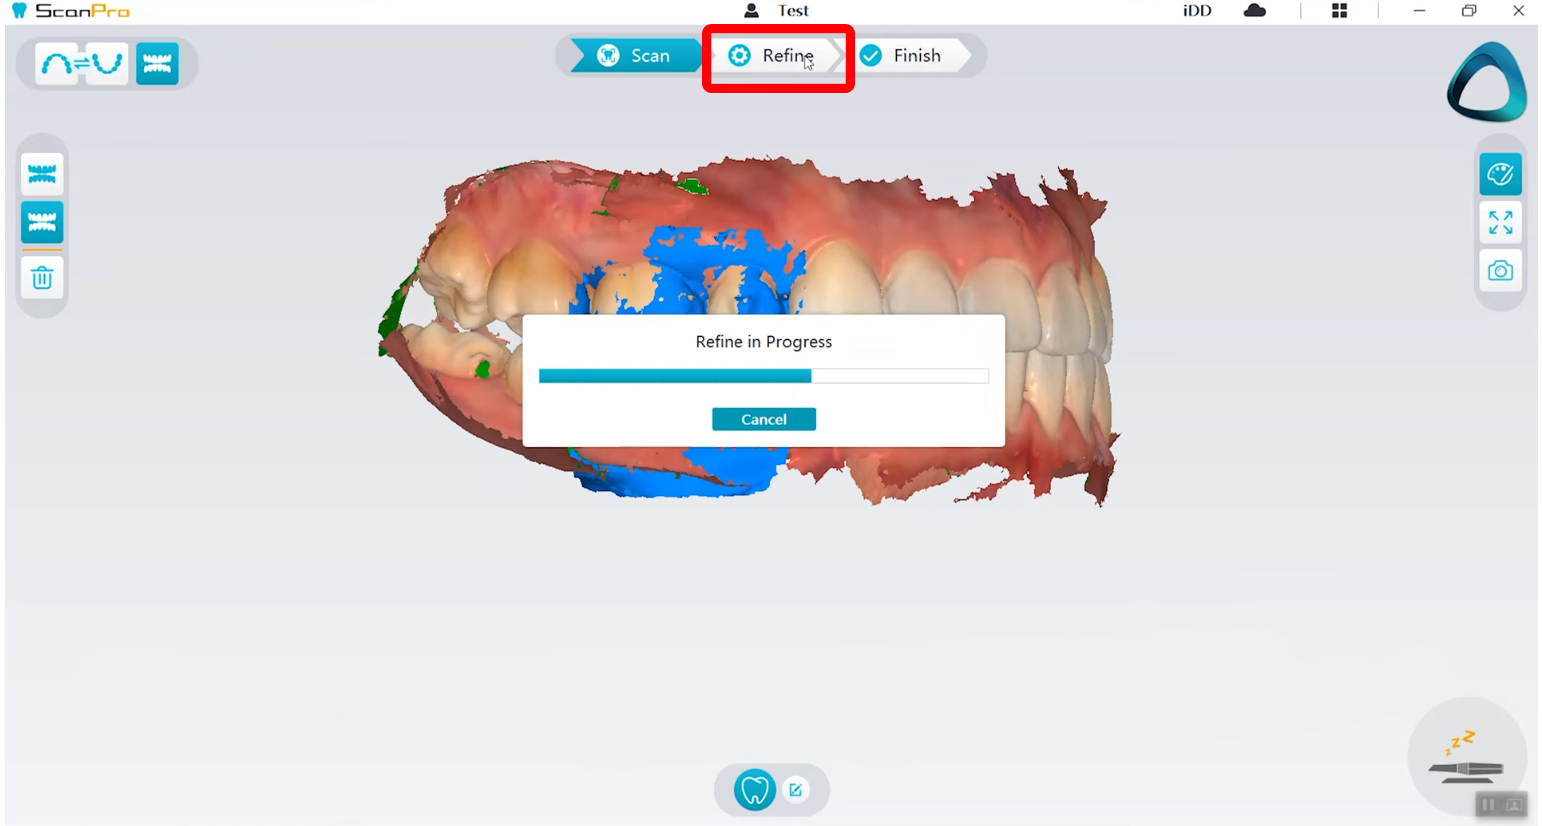
Step 4: Scan Optimization
Once both arches are scanned, click on the “Refine” tab to initiate the optimization process for both scans.
Step 5: Finish Scanning
To complete and save the 3D Model, click the finish tab and save the file to the local directory.

Step 6: Save and Export Files
Manually export the scans as STL/PLY files to the desired location and upload to your order to analyze via the link provided by your lab.

Last updated 28th April 2025.FOR MORE INFORMATION OR IN CLINIC SUPPORT, SPEAK TO YOUR LAB.
Nexus Connect Lab is designed for experienced digital dental laboratories.
For labs looking for more detailed information on Scan Gauge use and scanning, they can visit the Knowledge Base vis their Nexus Connect Lab account.